Sunday, March 28, 2010

Everything Grows With Love

A Quick and Easy way to Highlight the Family.
I love the water bucket and the flowers.
Doesn't take much more than some colored paper,
cute scissors to cut the paper, and some pens.
Easy to do, might take a little time and patience...but the outcome is beautiful.
Another perfectly beautiful page done by my niece Crystal.

***another cute idea would be to do different levels of flowers
and show a baby growing.***
One flower could be the birth picture
and then a few pictures between the years
and the last flower would be the child that year.


If you have any good ideas let me know...


Tuesday, March 23, 2010

Homemade Bread

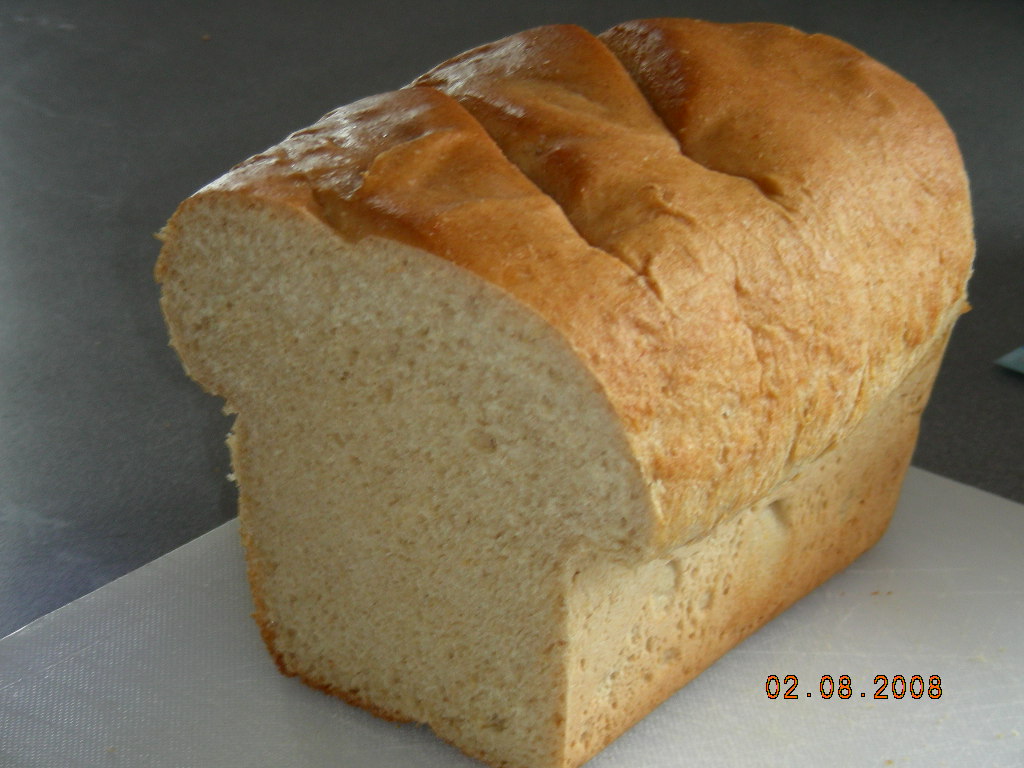
So for Family Night tonight we talked about self-reliance and made homemade bread together. It was honey whole wheat. This time we used a recipe that was half white flour, half wheat flour and ground the wheat ourselves, but I think next time we will try 100% whole wheat. We will be sure to take pictures and do a REAL post about it next time.


PS - We forgot to take pictures and now it doesn't look pretty, so I "stole" this picture for today's post from this website.


Saturday, March 20, 2010

Shatter Your Speed Limits


Interval Traning burns three times as much fat as running twice as long at a moderately hard pace. But intervals don't just help your heart, fat incineration, elevate good cholesterol and make you live longer, they also take way less time.
Here's how it works....When repeated bouts of high-intensity intervals are seperated by short rest periods, each bout begins with a lack of available energy, and muscles that are already fatigued. Interval training stresses energy systems in the body that aren't accustomed to being used. Blood supply to cells increases, the cells use oxygen more efficiently, and the enzymes that help create energy also increase. This improves fitness. What's more, recovery from interval training forces the body to continue burning fat for more energy. This all leads to an increase in postworkout calorie burning.
There are a lot of ways to do intervals and over time you can adjust intensity of your work out segment, ratio between rest and work, or alter length of entire segment. A suggested work out would be as follows...
using your preffered cardio apparatus, warm up for 5 minutes, perform 5 sets of 2 minutes of high intensity with 1 minute rest (buildup to 2 minutes of workout if unable to start at that rate) cool down for 5 minutes. That's less than 30 minutes!!! You should feel and see results in about 10 days!!! Glood luck.....I'm starting tonight.


Wednesday, March 10, 2010

Two words: Shrimp Rules!

Tom and I LOVE Red Lobster...so much that we went twice two weeks ago.  It is Tom's favorite restaurant so we went there for his birthday. Then he got a Red Lobster gift card for his birthday so we went again that weekend. This is slightly off topic, but it was our first dinner at a restaurant on a weekend in a long time.  It was so nice! But back to the topic at hand... we decided it was about time to try making our favorite dishes at home: Shrimp Scampi and Coconut Shrimp. We looked up recipes, bought ingredients and gave it a host last week.  The verdict: not too difficult and VERY yummy.  There were a few things we wanted to do different the next time.  A few of those changes are reflected below in the recipe itself and a few are listed as suggestions. (Our recipes are based on these two recipes we found at CDKitchen.)

COCONUT SHRIMP
1 cup Plain Bread Crumbs
1/4 cup Corn Starch (mix with coconut and bread crumbs)
1 cup Sweetened Coconut Flakes
1/2 cup Pina Colada Mix
1 tablespoon Powdered Sugar
1 teaspoon rum extract

2 tablespoons water
1/2 cup Corn Starch
Vegetable oil for deep frying
1/2 pound Large Shrimp (butterfly the shrimp)


  • Gather at least 3 mixing bowls and a pan for frying.  We used a wok because it is deep to contain popping oil.
  • Mix bread crumbs, 1/4 cup cornstarch, and coconut in a deep bowl and set aside. 
  • Combine Pina Colada mix, powdered sugar, water and rum extract in a small mixing bowl and set aside. 
  • Place 1/2 cup corn starch in a separate bowl. 


  • Heat oil for deep frying. Oil is ready for frying shrimp when it reaches 375 degrees. Ours cooked well at med-high heat on our stove.  Make sure it is hot enough or they will get soggy.
  • If your shrimp are not butterflied, you need to run a knife down the back where the vein was removed and pull them open to lay flat.
  • Coat shrimp first in corn starch, then into the Pina Colada mix, then dust shrimp in bread crumbs, coconut mixture. For the second coating place back into Pina Colada mix, then again into coconut, and then the bread crumb mixture.

  • Place prepared shrimp carefully into hot oil. Fry until golden brown (turning them once midway helped them cook evenly). 
  • Remove from fryer and drain on paper towels.


PIÑA COLADA SAUCE 
1 cup Pina Colada Mix (Major Peters mix was used)
1/4 cup Water
2 tablespoons Crushed Pineapple (drained)
1 tablespoon Sweetened Coconut Flakes plus
1 teaspoon Sweetened Coconut Flakes
3 tablespoons Powdered Sugar plus
1 teaspoon Powdered Sugar
3 teaspoon Corn Starch
3 teaspoons Cold Water

  • Mix Pina Colada Mix, water,crushed pineapple, coconut, and powdered sugar in a small sauce pan. 
  • Heat on medium low temperature until sauce begins to simmer, stirring frequently. 
  • Let mixture simmer slowly 10 - 12 minutes. 
  • Mix corn starch and water together, add to sauce and blend well.
  • Let mixture simmer for 3 - 5 minutes longer while stirring during and after adding cornstarch. 
  • Remove from heat and bring to room temperature. (We learned that it cools faster if you fill your largest mixing bowl with ice and nestle the small sauce pan in the ice for about 5-10 minutes)
  • Sauce is served at room temperature with Coconut Shrimp.


SHRIMP SCAMPI


1 cup white grape juice
1/2 cup unsalted Butter (do not use Margarine) We plan to double this next time because it didn't seem buttery enough to us.
3 teaspoons minced Garlic

1 tablespoon parsely
1 teaspoon salt
1 pound Shrimp, peeled and deveined


  • Preheat oven to 350.
  • Mix sauce ingredients in a baking dish. 
  • Arrange shrimp in the sauce.


  • Bake  for about 6-10 minutes. Be careful not to overcook the shrimp. The shrimp is done when it has turned pink. The sauce won't bubble much, but you want to let it get nice and hot.

We were so excited and proud of our home-cooked Red Lobster dinner.  We were also going to make cheddar biscuits, but we had so much food that we decided to do it another time.  Here are some pictures of the spread...


Well, there it is.  Hope you enjoy it!  If you try it out, be sure to let us know how it goes for you.  We sure loved it!!


Monday, March 8, 2010

~My Daughter's Birthday Party~


My amazing niece Crystal took a bunch of pictures at my daughter's 4th birthday party. I was looking through Crystal's scrapbook and found many pages that I loved that she spent so much time on. I will be talking about these pages throughout the weeks, so stay tuned for those. This page is the highlight this week because my daughter's birthday was just a few weeks ago. My favorite part of this is she picked her favorite pictures at the party and made a BIRTHDAY CAKE and BALLOONS out of the pictures. Her ideas were fantastic and it just makes the page. Crystal you are a very talented and creative girl, keep it up! By the way, I intend on stealing this idea for my scrapbook and when I do.... I will show you what I come up with. :)


Thursday, March 4, 2010

You asked for it...

By popular demand (or maybe just a single demand), here it is...

Custom Blog Elements 101

In my experience, the background was the most simple part to create, so we will start there. For now, we will pretend it didn't take me the longest on this element because my biggest frustration was keeping the background from being downsized before I got to use it.  So... backgrounds..

I started off in paint, but really, if you are going to do much customizing, I recommend you download a free image editing software called GIMP.  It is a bit like Photoshop, but free and with my limited, though growing skills, I don't know what I am missing out on, so most of you won't either.

Either way, you should start by finding a digital scrap kit that suits your needs.  Free is always good, and my preference, but you can do whatever you want.  A google search of "free digi scrap kit" turns up thousands of hits and I combed many of them, but my favorite was this one. My favorite feature was the topics list on the right.  For this blog, I chose to click on home and found many options. I picked one from there called Tiramisu and downloaded it.  Here is the download screen.


I put all the downloaded files into a special folder on my computer. Once you have the files you should go through and decide what papers you want to use for your background. Then open them in paint or GIMP and move things around to make the background you want.

Now for the tricky part... using the background you just made. You need to save it at a proper size.  Both paint and GIMP have this option.  If you are doing a background like the one here, the only crucial dimension is width.  Standard screens these days are 1024 pixels wide.  Before you save your image, make sure it is 1024 pixels wide.  Ideal height is 768 pixels.  


Now you need to upload the image to a hosting site. I was told any would work, but found that Picasa downsized my image, making it too small to fill the whole screen.  I recommend Photobucket.  When you upload it, make sure you go into the "more options" and select "1 megabyte file size" or it may also downsize your image.


Now find the file and upload it. Somewhere along the way, it will give you and option to save and share. On the next screen it will have a list of codes. You want the direct link. Highlight it and then click C while holding CTRL (CTRL+C) or you could right-click and choose copy.

Now for the hardest part.  If you are in blogger (blogspot.com) it is very easy to add the background to your blog.  First make sure your template is Minima.  The template is under the layout tab when you choose to customize your blog. Once you have confirmed that, your next step is to go to "Page Elements" under the layout tab. To add your background, you need to add a gadget. The gadget you need is called HTML/JavaScript.  You can leave the title blank or call it whatever you want.  It doesn't matter.  The important part is the code. Here is the exact code in mine:

<style type="text/css">body {background-image: url("http://i904.photobucket.com/albums/ac243/jacquedee/backgrounds/tiramisubackgroundpretty.jpg"); background-position: center; background-repeat: no-repeat; background-attachment: fixed; }</style> <div style="position:absolute; top:30px; left:0px; border:0px;"></div>

Simply paste that code into the content box and replace the part in red with the link you copied from Photobucket. Then hit save and your background should be added.  Then hit save again and you should be able to view it.  I hope I explained this well enough for everyone to understand, but feel free to ask questions in the comments if something is confusing and I will go back in and fix/add things.  Good luck!


Tuesday, March 2, 2010

Reach For The Water!


The benefits of drinking water are so amazing that it's been called the "forgotten secret of health". Many of us are walking around dehydrated right now. If you wait to reach for the water until you are thirsty, you are already dehydrated and this is affecting your cells. About 75% of your body and 90% of your brain is water. All functions within your body require the presence of water. Regular hydration will boost your energy levels. It will also boost your immune system and mental sharpness.

Drinking water is very important if you are trying to lose weight. Thirst and hunger sensations are triggered together; therefore, if there is a slight dehydration the thirst mechanism may be mistaken for hunger. One may feel the desire to eat when the body is actually craving fluid. While most foods contain some water, if one doesn't drink much, one might be driven to eat more to gain the necessary water supply the body desires. Drinking more water can help prevent overeating and benefit weight loss.

More to come.......


Custom Blogs

So for our 7 followers (several of which are actually our posters), do you like the new look? Did you even notice the change? If you did, I hope you appreciate it. It probably took me a total of 24 hours or so of ACTUAL work to get it where it is now. The best part? Seeing the beautiful results and knowing I did it all by myself for FREE. The worst part? The frustration along the way when every little detail hit a brick wall, causing me to feel a strong desire to throw my laptop out or third floor window. Now that it is all done (well, for now... I am sure I will find other little details to change on a fairly regular basis), I am wondering... are there any of you who blog? Would you be interested in reaping the blessings of my days of pounding away at learning how to customize a blog? If there is any interest I could make a series of posts about it. Any takers? If so, please leave a comment so I know.

Doing Domestic Duties


Related Posts with Thumbnails